Prerequisites
- Create or Select a Tenant: We will need to use the
idanddomainlater so make a note of this information. - Create Admin User (in the store):
- We must have the user within the tenant:
onix-intake@publica.lawith admin privileges. - Create/Use the SFTP password as the user password. If you don't have one, create one and make a note of it.
- Log in to the store with the user
onix-intake@publica.la, go to Settings -> Integrations -> API integration keys -> and Generate new Key. This will generate an API key for the user that we will need to use later. - IMPORTANT: Save credentials in 1Password
- We must have the user within the tenant:
Creating the Intake
- Go to Medusa Nova →
Resources > ONIX > Content Intakes - Complete the form:
- Name: Usually the tenant name
- Enabled: Toggle on for automatic processing. Activate if you want it to start processing automatically. You can create it and then change this status. If the process isn't automatic, you can run it manually.
- Use dummy files: Enable for testing with lightweight files
- Force Show marketplace: Enable to make content available in marketplace
- Uploads content on behalf of tenants: Enable for sharing with aggregated stores
- SFTP Username: Choose a username for the bucket
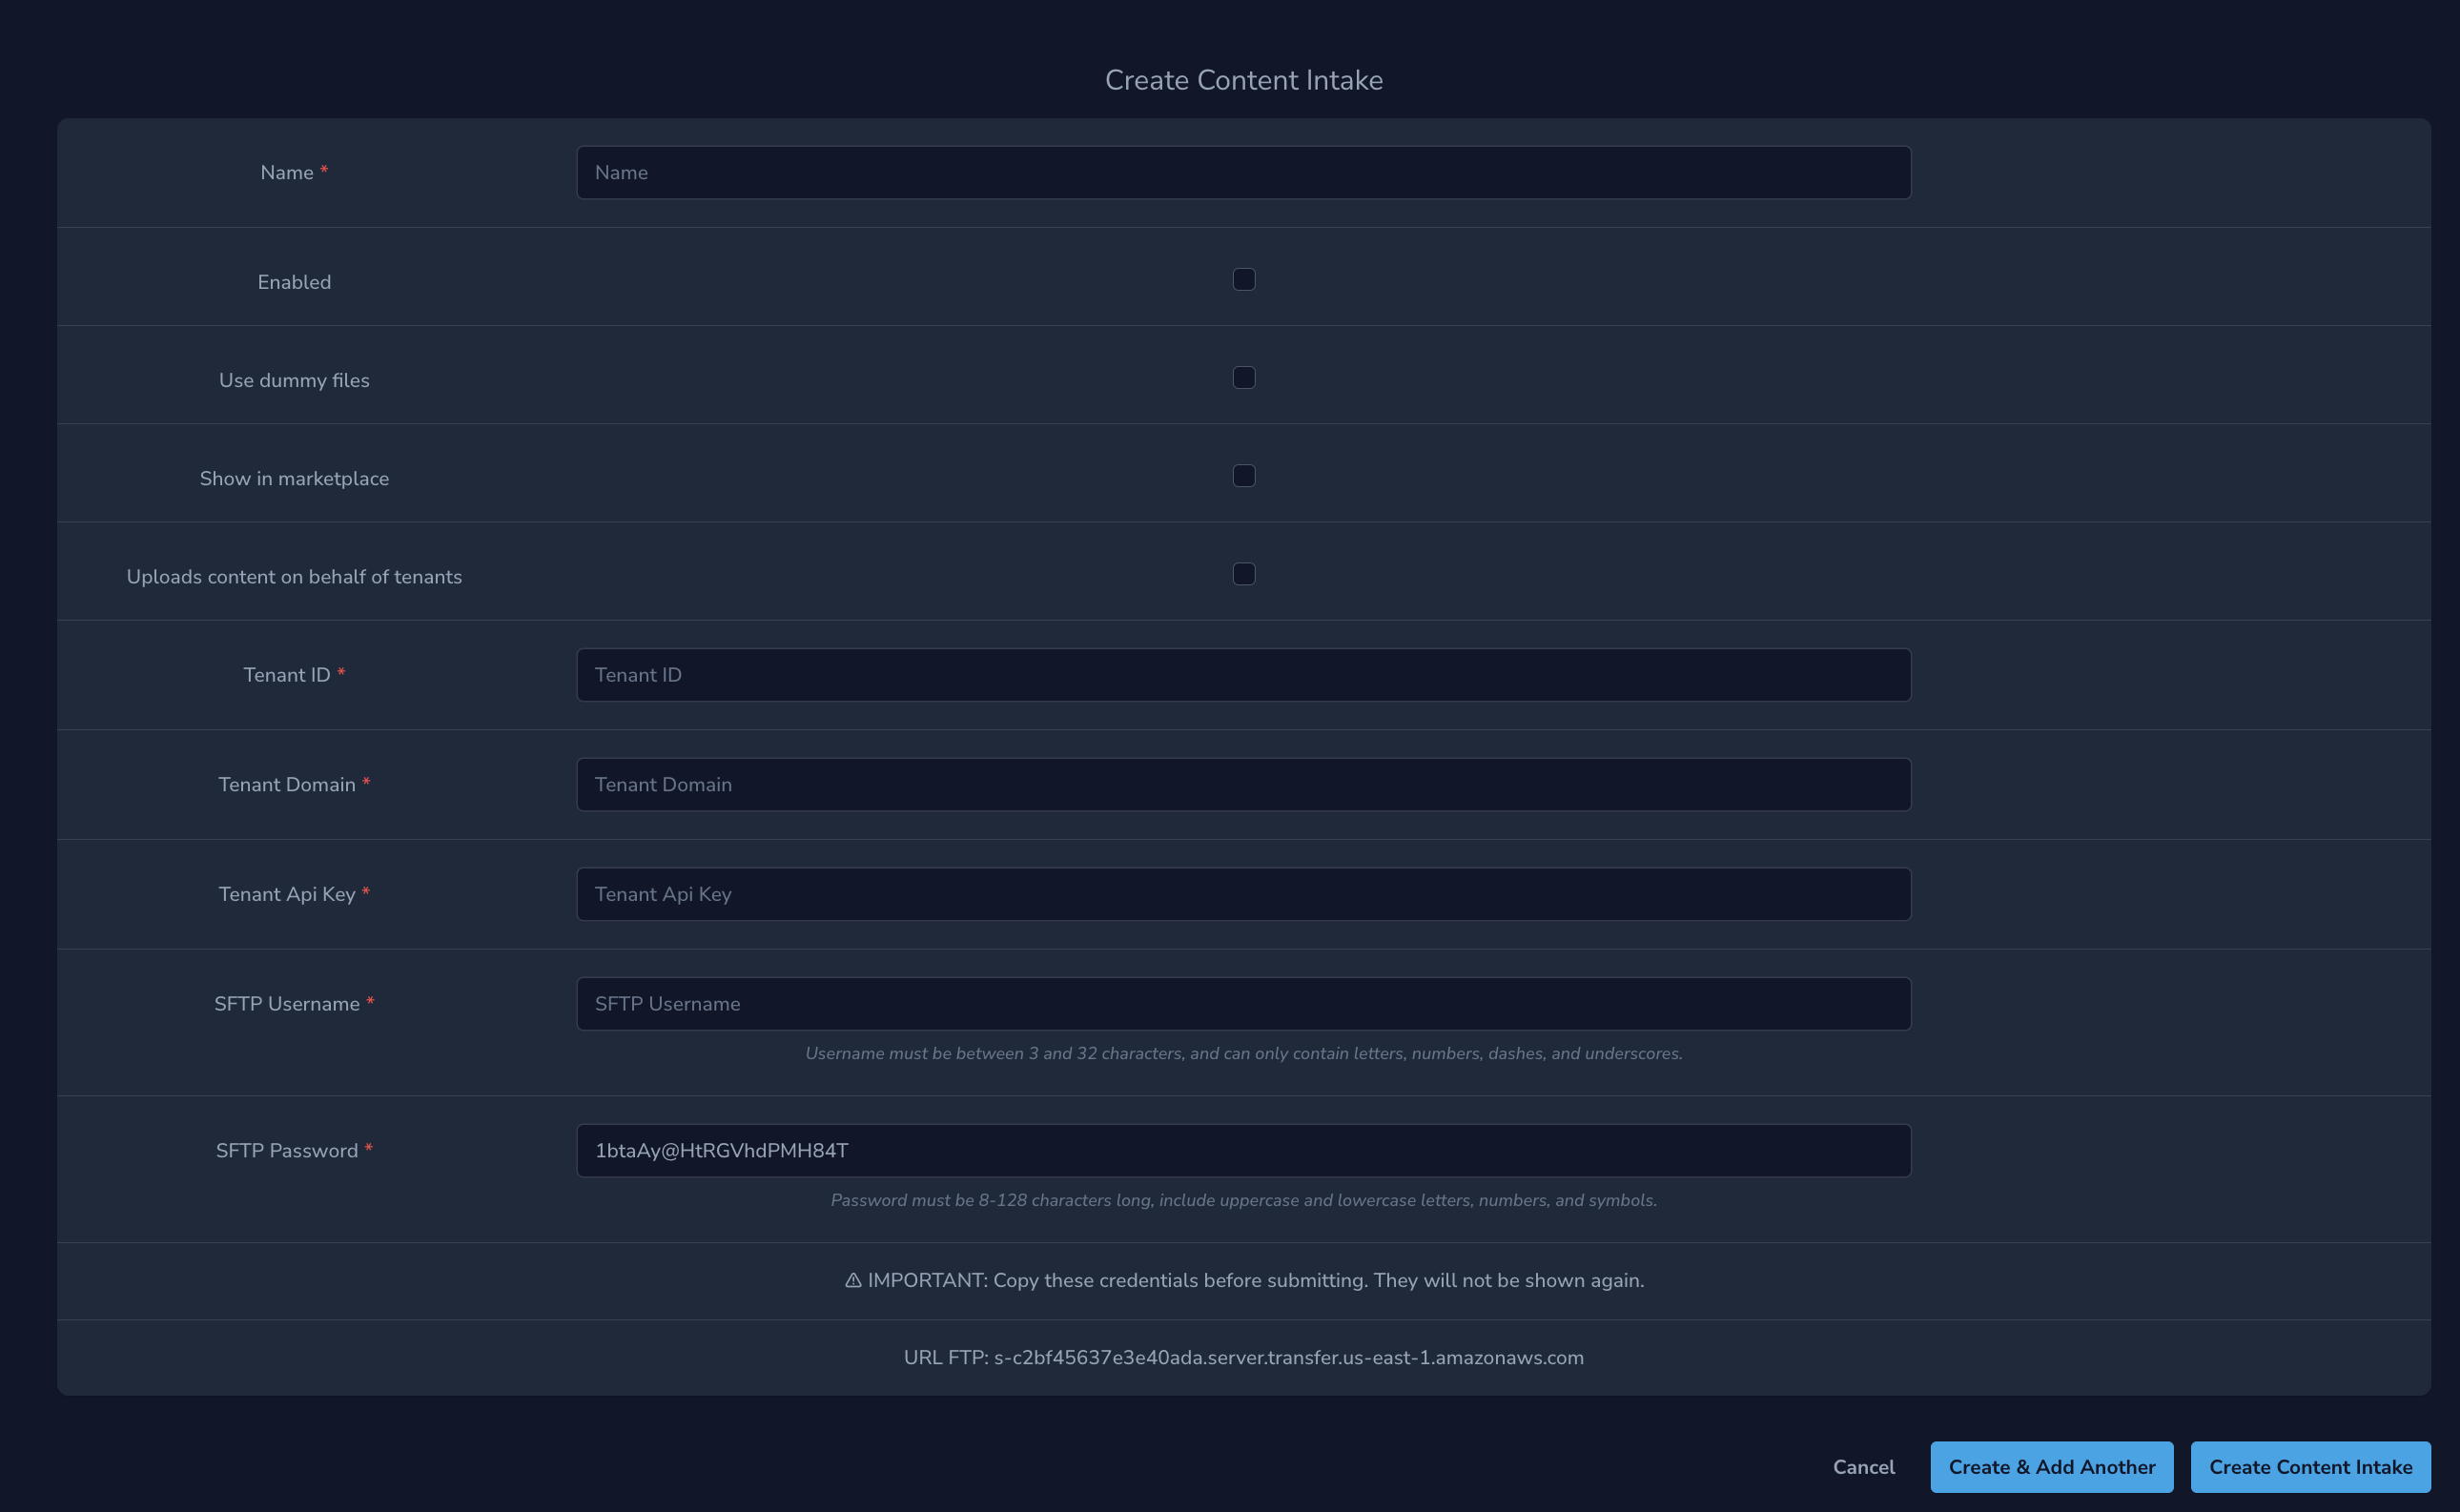
important
Save the generated SFTP credentials in 1Password before confirming
Sharing Content via ONIX
Content owners can share their publications with other tenants using the ONIX Intake system.
Setting Up Content Sharing Permissions
- Go to the content owner's NOVA Dashboard
- Navigate to
Permissions > Content Permissions - Click Create Tenant Content Permission
- Select ONIX Share as the Permission Type
- Choose the target tenant in the Target Tenant ID field
- Save by clicking Create & Add Another or Create Tenants Permission
info
This permission enables sharing but doesn't automatically share content. The content owner must still specify what to share via the ONIX Intake.